Auto fill dates in Excel: a short guide
Managing dates efficiently is crucial for tasks like scheduling, data analysis, and project management. Manually entering dates can be time-consuming and prone to errors, especially when dealing with large datasets. In this guide, we’ll find out various methods for automatically filling dates.

Why use auto fill date functions?
Auto filling dates offers numerous benefits, making it an essential feature for professionals who work with date-based data. Instead of manually typing each date, you can generate structured date sequences within seconds. This improves accuracy, ensures consistency, and saves valuable time.
For example, if you’re working on a project timeline, an attendance sheet, or financial records, you can quickly populate a column with dates using auto fill. This reduces human error and makes it easier to analyze data, apply formulas, and visualize trends. Whether you need daily, weekly, or custom intervals, auto fill functions provide a flexible and reliable way to manage dates efficiently.
Let’s see how to auto fill dates.
How to auto fill dates in Excel
The most basic use of auto fill is generating a continuous sequence of dates. This is useful for creating timelines, schedules, or data logs where each row represents a specific date.
Now, let’s see how to auto fill sequential dates using ONLYOFFICE Spreadsheet Editor.
- Open the editor and create a new spreadsheet.
- Type the initial date into the first cell where you want the series to begin.
- Click on the cell containing the starting date and hover over the bottom-right corner of the selected cell until the cursor changes into a small black cross.
- Click and drag the fill handle downward (or to the right) to automatically fill adjacent cells with sequential dates.

By default, ONLYOFFICE Spreadsheet Editor increments the dates by one day. Example: If you enter “01/02/1993” in cell A1 and drag the fill handle down, it will populate the following cells as:
- A2 → 02/02/1993
- A3 → 03/02/1993
- A4 → 04/02/1993
and so on.
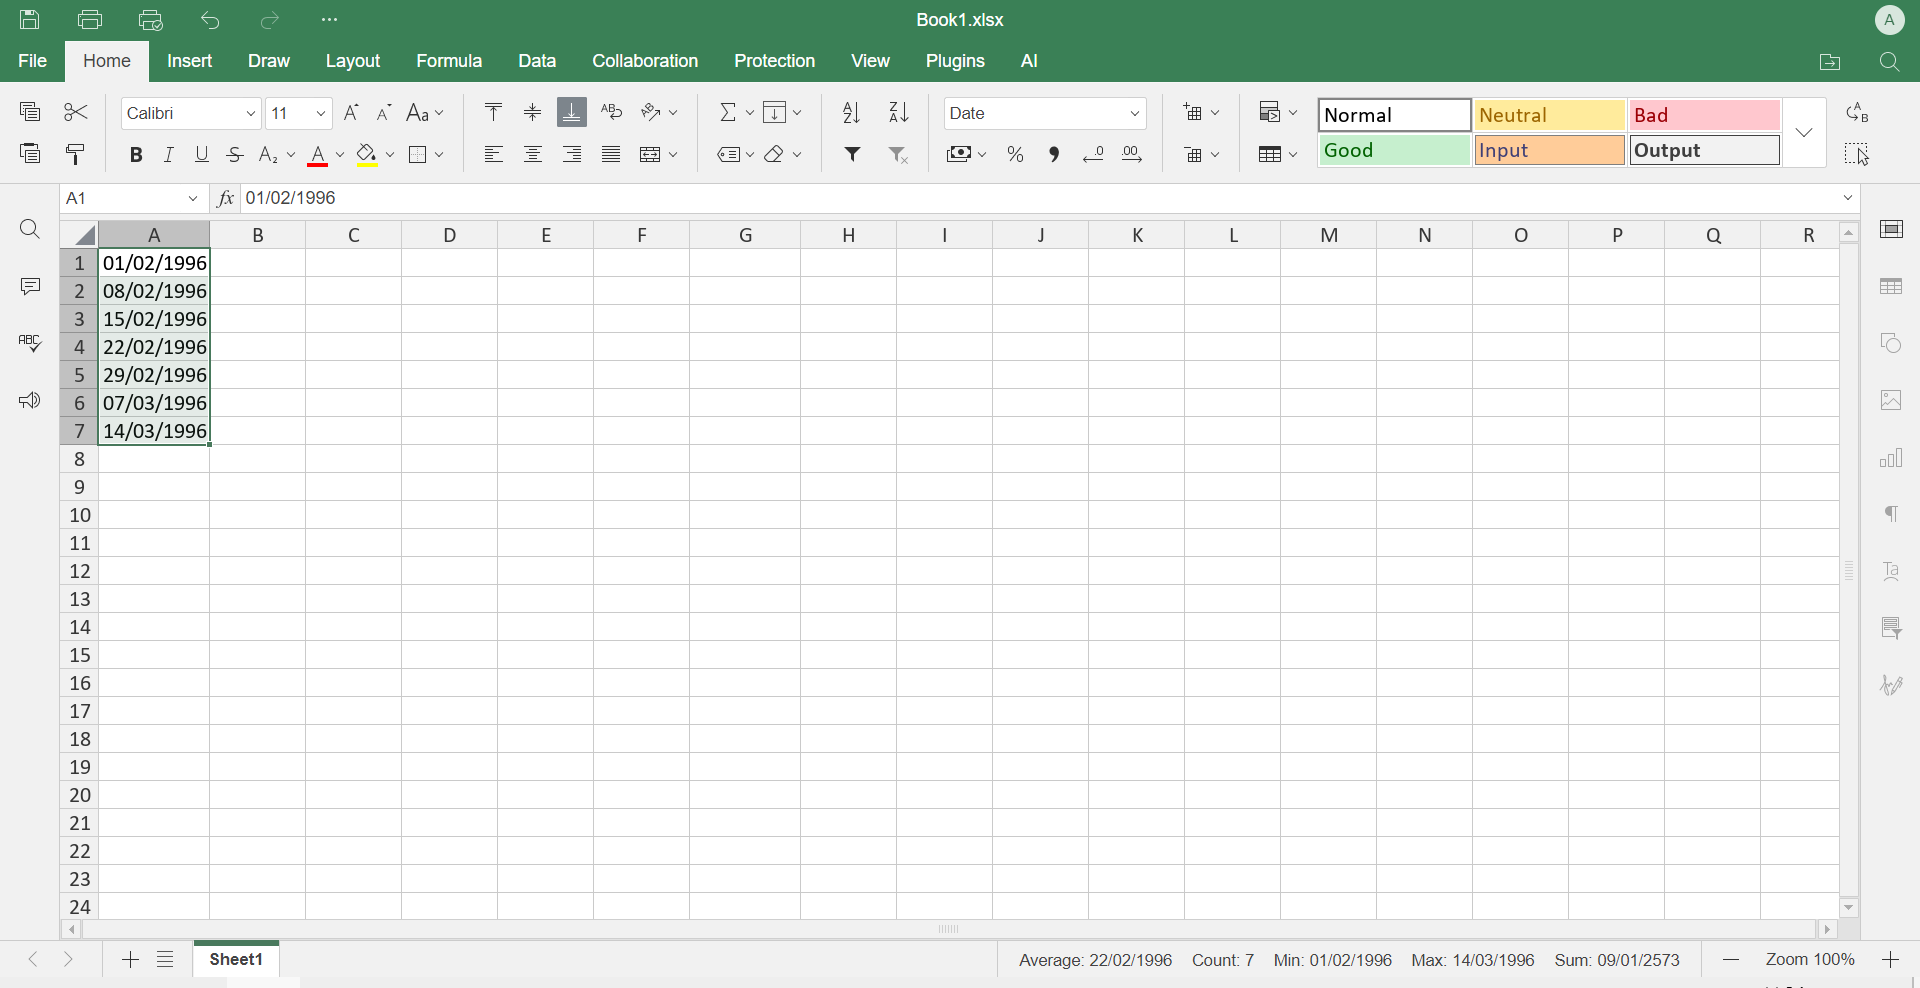
How to fill with weekly date range
In some cases, you may need to fill dates in weekly increments rather than daily. This is useful for scheduling tasks that occur on a weekly basis, such as meetings, reports, or project deadlines.
1. Type the first date of the series in the starting cell.
2. In the next row (or column), type the date exactly 7 days later.
3. Highlight both cells to establish a pattern to follow.

4. Click and drag down (or across) to extend the sequence in weekly increments.
Example: If you start with “01/01/2025” in A1 and “08/01/2025” in A2, selecting both and dragging down will generate:
- A3 → 15/01/2025
- A4 → 22/01/2025
- A5 → 29/01/2025
and so on.

Fill with weekly date range using an Excel formula
Instead of manually entering the second date, you can use a simple Excel formula:
- Enter the starting date in A1.
- In A2, enter the formula: =A1+7
- Press Enter, then drag the fill handle down to continue the sequence.

This method ensures that all future dates remain dynamic—if you change the first date, the entire series updates automatically.
Filling with weekly date range using Fill Series
ONLYOFFICE includes the Fill Series feature that allows you to create structured date sequences based on specific increments. This function is particularly useful for generating ordered lists of dates, such as work schedules or financial reporting periods.
- Select your starting date and drag cursor down to define the cells in which the dates will be inserted.
- Navigate to the “Fill” menu, and choose “Series”.
- Customize the step value and stop criteria for your sequence.

- Click OK to insert the dates.
To learn all the details about the Fill Series function, read this article of our blog.
Filling dates from one sheet to another
When working with multiple sheets, you may need to reference a date from one sheet in another. This is useful for consolidating data, maintaining consistency across different reports, or automating workflows.
- Locate the cell in the source sheet that contains the date you want to reference.
- Navigate to the sheet where you want the date to appear.
- In the target cell, type a formula referencing the source cell.
Example: If the date is in Sheet1, cell A1, enter the following formula in the destination sheet: =Sheet1!A1
This will display the exact same date from Sheet1 in the new one. If the original date changes, the referenced value will update automatically.
Conclusion
Mastering ONLYOFFICE’s auto fill functions for dates can significantly improve your workflow, whether you’re managing project schedules, financial reports, or attendance logs. By using these techniques, you can efficiently handle date entries, saving time while reducing the risk of errors. Choose the method that better suits your needs and start working now!
Get ONLYOFFICE Spreadsheet Editor
Would you like more automation? Explore advanced ONLYOFFICE formulas and macros to take your spreadsheet skills to the next level!
If you don’t have a ONLYOFFICE DocSpace account yet, you can create one for free right now and test the capabilities of its Spreadsheet and all the other editors. Try it online or with our desktop applications.
Create your free ONLYOFFICE account
View, edit and collaborate on docs, sheets, slides, forms, and PDF files online.