ONLYOFFICE DocSpace app for Drupal released: make office files easily accessible to your website visitors
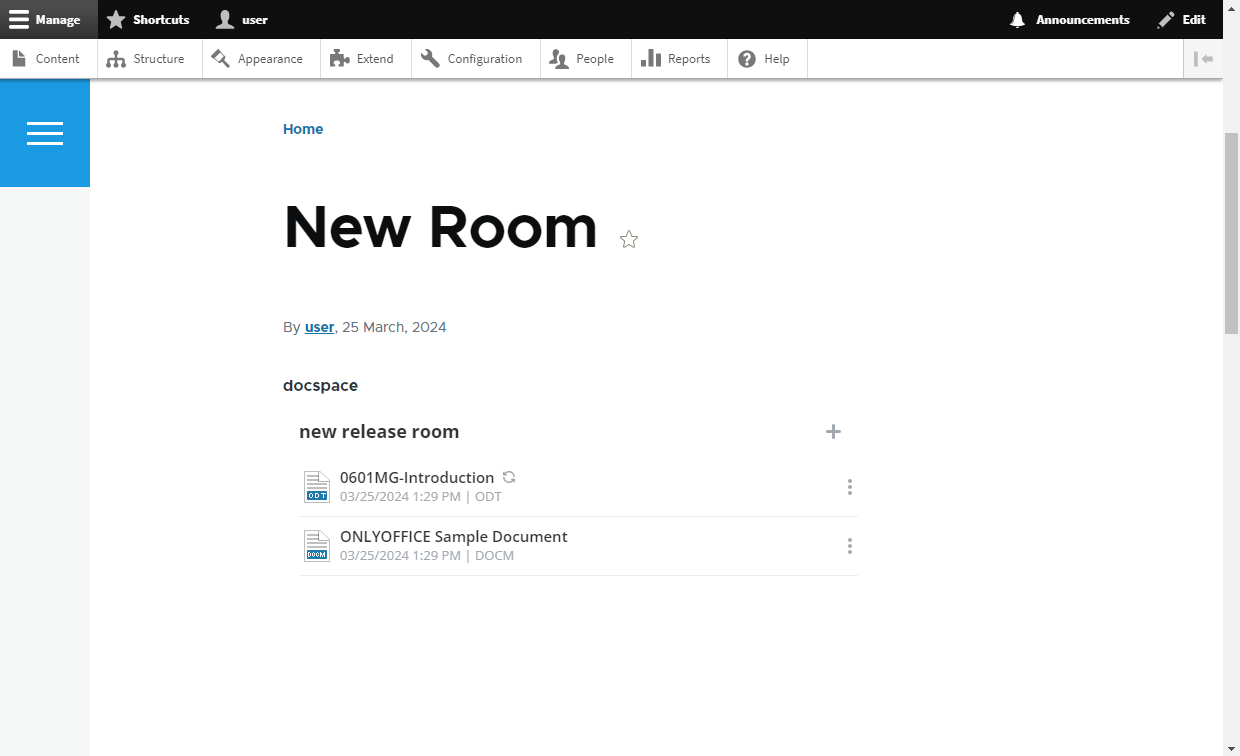
Meet the new integration — ONLYOFFICE DocSpace and Drupal. The DocSpace module allows embedding rooms with content and office files to your Drupal pages in order to ensure your website visitors are able to easily access them. Explore the details below.

Main app features
- Adding DocSpace rooms and separate files to the Drupal pages. This way, visitors of your website can view and interact with office documents right on the web page without downloading.
- Storing and managing docs, sheets, slides, forms, and PDF via DocSpace from the Drupal interface.
- Editing and collaborating on office files with other users via DocSpace from the Drupal interface.
Installation and configuration
- If you’re new to ONLYOFFICE DocSpace, create a free cloud account or deploy it on-premise.
- Switch to the Extend section in the admin settings of your Drupal and click Add new module. Upload the DocSpace app archive and click Continue. When the uploaded DocSpace module appears in the list, select it and click the Install button.
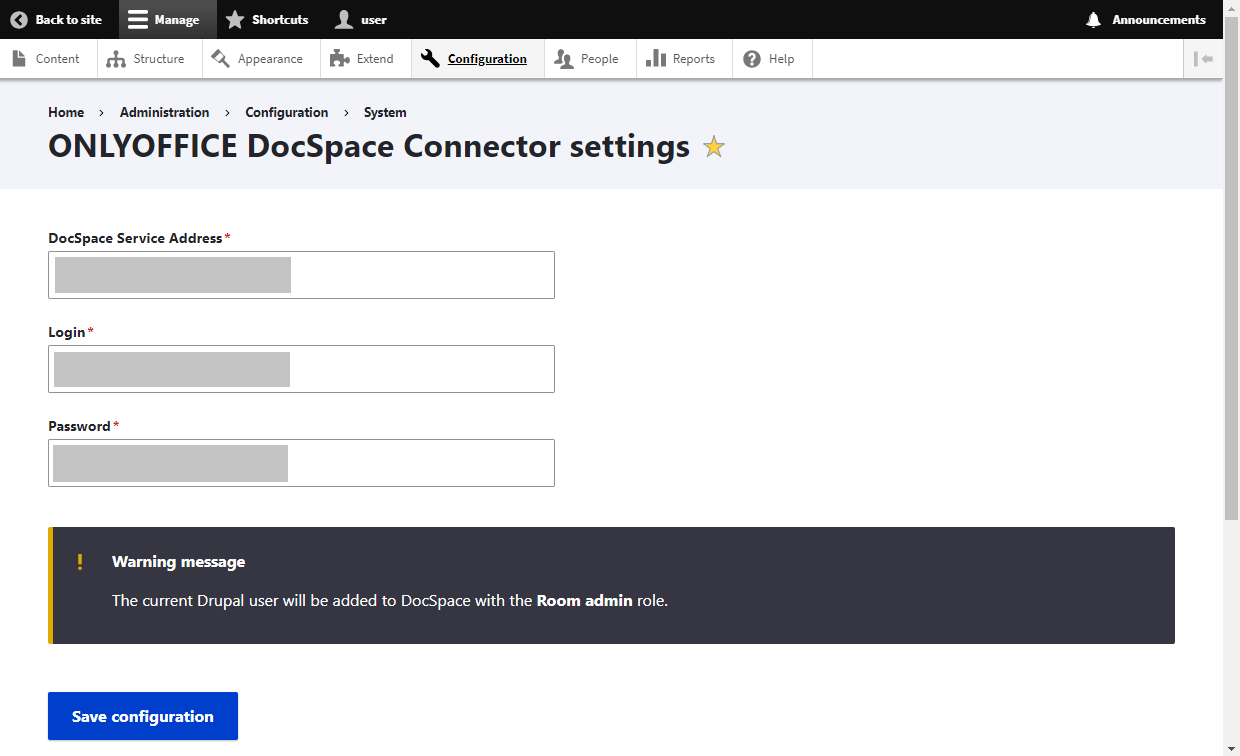
- Go to Configuration –> MEDIA –> ONLYOFFICE DocSpace Connector settings and specify your DocSpace address, admin login and password.
- When you click on the Save button, a user with the Room admin role will be created in ONLYOFFICE DocSpace, with the same data as the current Drupal user. A public user (Drupal Viewer) will be also added to DocSpace with the View Only access.
- Go to Settings -> Developer Tools -> JavaScript SDK in your ONLYOFFICE DocSpace and enter the Drupal address in the Embed DocSpace as iframe section.
You can download the ONLYOFFICE DocSpace app for Drupal from GitHub or Drupal Project Page.
Exporting users
Once the DocSpace module is installed and configured, you need to export users from your Drupal. Click the Export Now button – a page will open which contains a list of Drupal users with the specified email address in their profiles.
To add a user or several users to DocSpace, check them in the list, select Invite to DocSpace and click the Apply to selected items button.
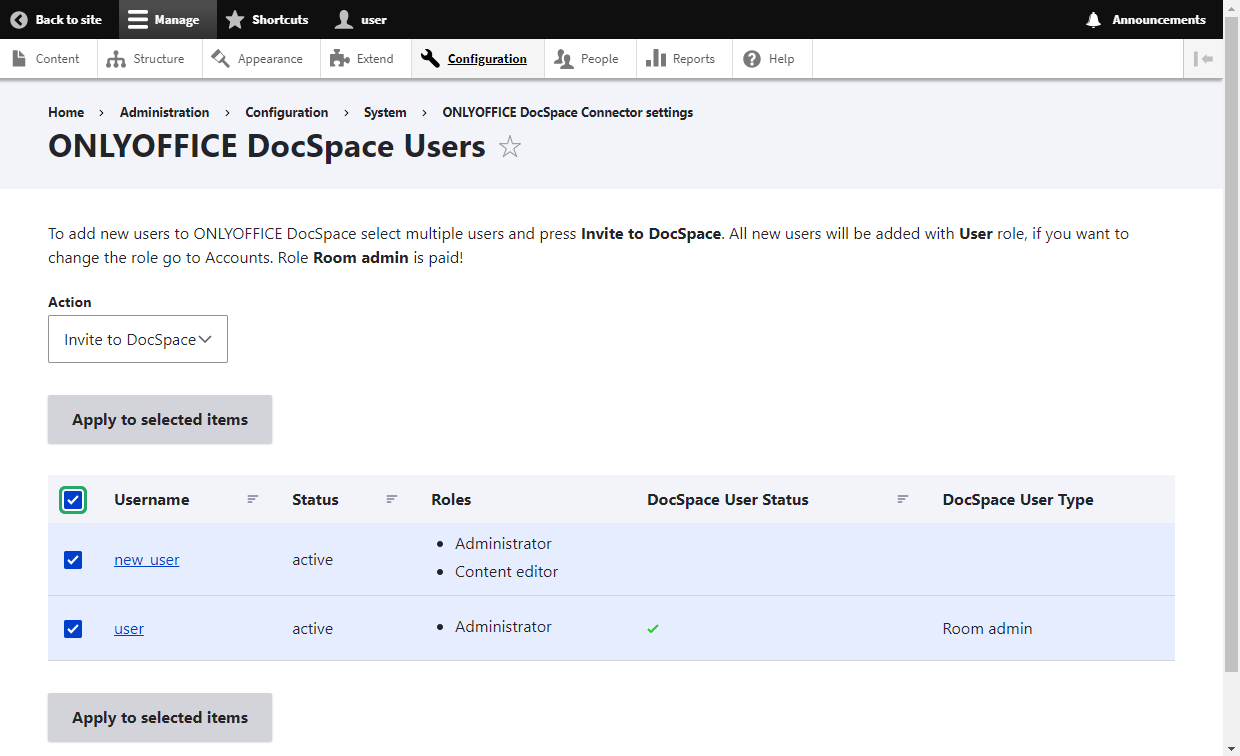
In the DocSpace User Status column of this list, you can track whether a Drupal user has been added to DocSpace or not:
- Green checkmark: a Drupal user with the specified email has been added to DocSpace. Synchronization was successful.
- Empty value: there is no Drupal user with the specified email in DocSpace. You can invite them.
- Hourglass: there is a user in DocSpace with the specified email, but there was a synchronization issue. When logging into the DocSpace plugin for the first time, the user will need to provide a DocSpace login and password to complete synchronization.
Working in ONLYOFFICE DocSpace from Drupal
After setting up the module, DocSpace will become available for users with the Administer ONLYOFFICE DocSpace connector permission. To adjust the access rights, go to People –> Permissions -> ONLYOFFICE DocSpace Connector.
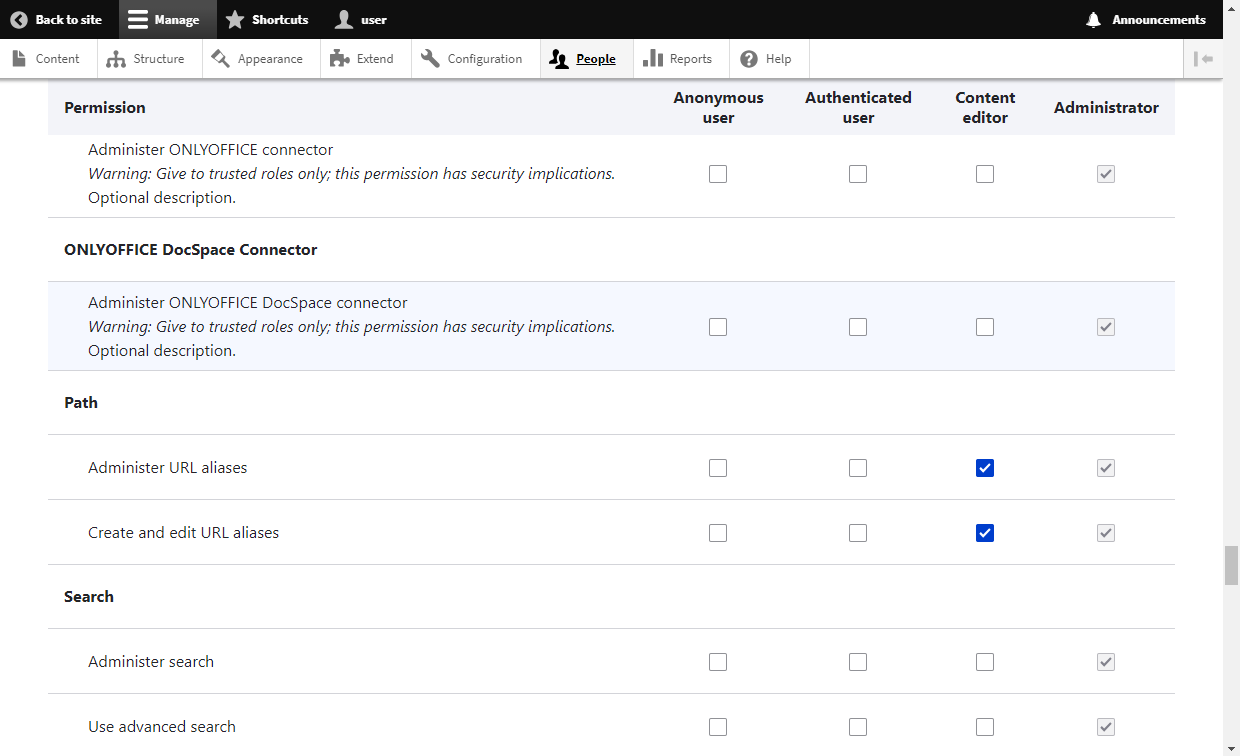
Such users are able to access ONLYOFFICE DocSpace where it’s possible to create Collaboration, Custom rooms and Public, invite users, and collaborate on documents within the rooms.
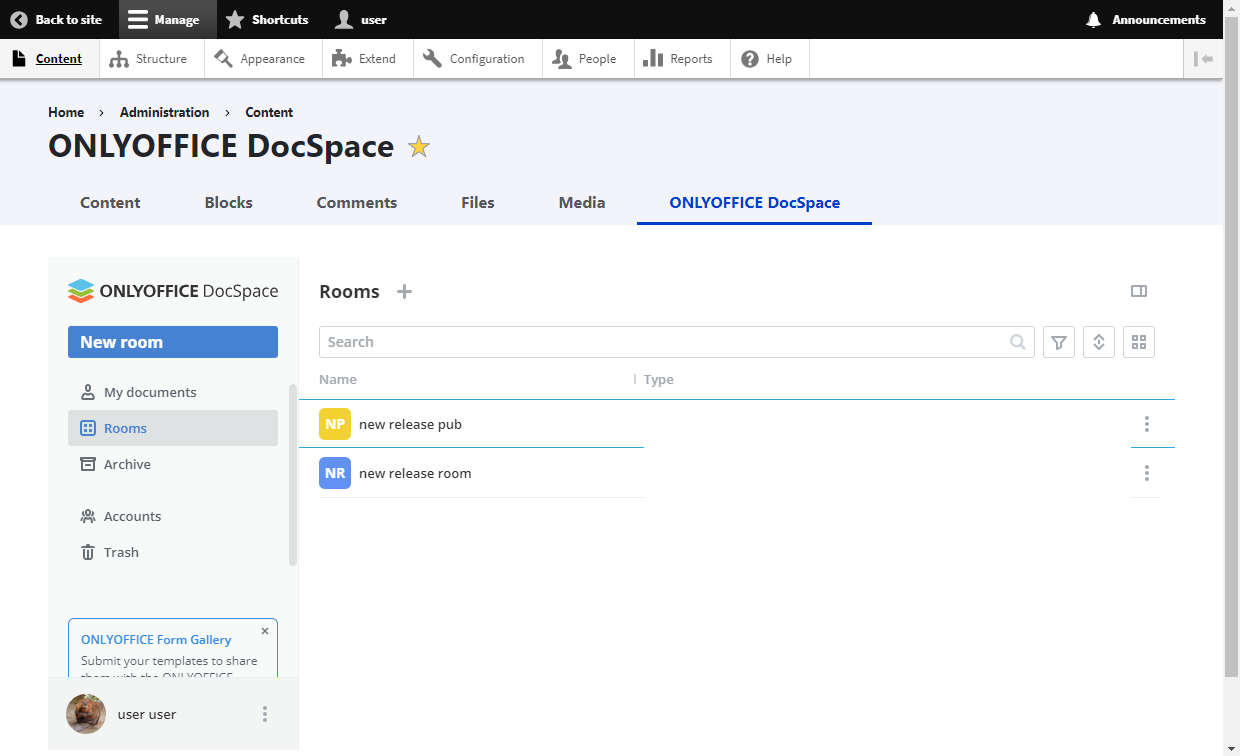
Refer to the user guides or watch this video to find out what you can do in DocSpace:
Adding rooms and files to the Drupal pages
Before you can add a DocSpace room or file to the Drupal page, you need to make changes to the table structure. Go to Structure -> Content types and click the Manage fields button next to the needed element.
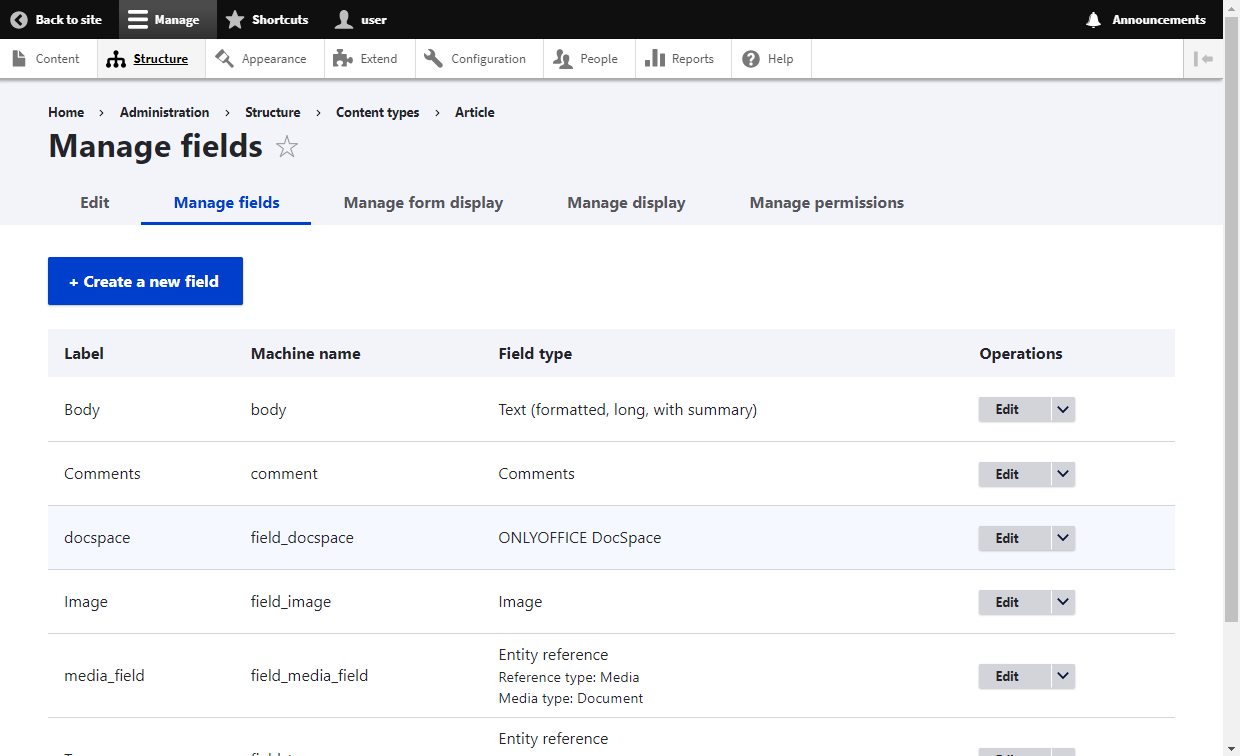
On the opened page, click the Create a new field button. In the drop-down list, select ONLYOFFICE DocSpace and specify the name.
If you would like to change the size of the DocSpace element on the published page, go to Structure -> Content types for the desired element and click the Manage display button. In the previously created DocSpace field, click the gear icon and specify the desired sizes. Once ready, hit Save.
When you are done with the preparatory steps, go to the Content tab, click Add Content and select the content type to which you have added the ONLYOFFICE DocSpace element.
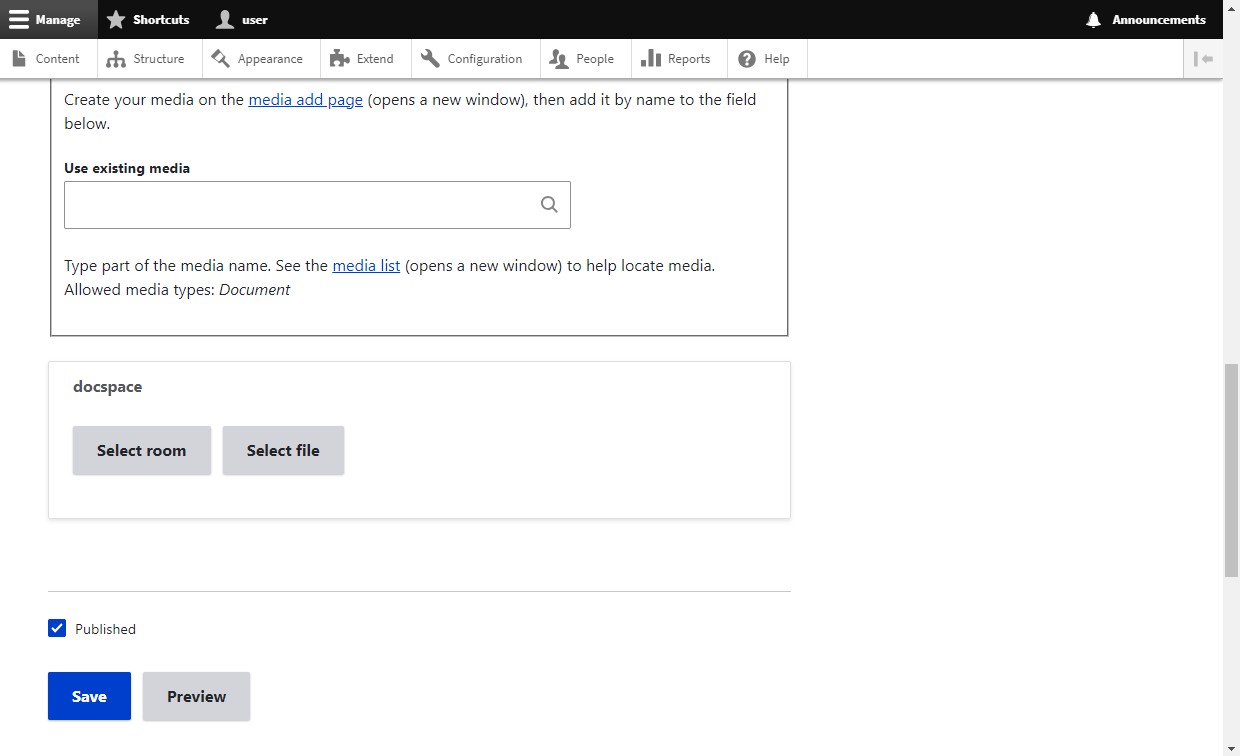
To add a room, click the Select room button, select the available room from the list and press Select.
To add a file, click the Select file button, select the desired file from the room and press Save.
When publishing content, all rooms and files are shared with a public user (Drupal Viewer), in case the View published content setting is activated.
Access rights to the DocSpace rooms and files on the published Drupal pages are determined depending on the availability of the DocSpace account:
- If user has a DocSpace account: the access rights set for the user are used. For example, if a user was invited to the room in advance with the Room admin rights, they will see the Drupal page with the published room available for editing.
- If user does not have a DocSpace account: a Drupal Viewer account is used to access the room/file for viewing if an anonymous users can view the content.
Please note the following specifics for DocSpace rooms published on Drupal pages:
- DocSpace left menu is not available;
- Navigation is possible within the added room only;
- If users have the Room admin or Power user role, they can create new files.
Useful links
DocSpace app for Drupal: GitHub / Drupal Project Page
More info about ONLYOFFICE DocSpace
Create your free ONLYOFFICE account
View, edit and collaborate on docs, sheets, slides, forms, and PDF files online.


