How to add shapes to PDF
Enriching your documents with shapes can improve their clarity, visual appeal, and functionality. Whether you need to add shapes to a PDF in the process of creation or to an existing document, there are various methods to achieve the desired result. Read this article and find out how to do it.

Why add shapes to PDF?
We are well aware that the visual element is of paramount importance to capture the readers and keep their concentration.
Shapes can help us to draw attention to key areas or important information in a document. Here are some examples:
- Rectangles can highlight a section of text, or can be added away from the main text to add further information.
- Circle around a typo or a line to underline an important term can make your feedback clearer and more direct.
- Arrows can point to a critical data point in a chart.
- Diagrams, tables and flowcharts can help organize data in technical documents and allow a faster approach to their content.
- Shapes can be used for annotating the document, making it easier to add comments, notes, or feedback. This is a particularly useful option for collaborative reviews and editing processes.
These simple shapes can transform a plain document into an engaging and informative piece. Now let’s see how to insert them in a document.
How to add shapes to PDF online
One of the easiest ways to add shapes to a PDF online is by using ONLYOFFICE PDF Editor. This feature was introduced in version 8.1, making it a relatively new addition to the software’s capabilities. Here’s how you can add shapes to a PDF using ONLYOFFICE PDF Editor.
First of all, open ONLYOFFICE PDF Editor and upload your file, or create a new one.
If the document you wish to edit was created using another editor, it may be necessary to allow editing. To do so, go to the Home tab and click Edit PDF.

Now that the page has been reloaded, you can start editing your document.
Go to the Insert tab, and choose the option Shape.

Here you will find numerous arrows, lines, charts, buttons, callouts, geometrical figures and much more:

Click on the shape you need, and insert it into the document by clicking on the desired point and dragging the cursor to give it the required shape and size.

Now that the shape is in place, you can customize it. By clicking on the object, the shape settings icon will appear on the vertical toolbar on the right. Click there to open the menu.

Here you can choose a color that better suits the document, the direction of the shape, the wrapping style and more.

Once you have placed the shapes, you can further modify their position and size. If you are satisfied with the result, save the document and that’s it!

This is just one of the many functions that the ONLYOFFICE PDF editor offers. Don’t miss the opportunity to also try the other editors within the suite: work on text documents, spreadsheets, presentations and PDF forms using advanced features and in full security.
Take a look at this video to discover the features of the new version 8.1:
Do you want to try ONLYOFFICE PDF Editor, but you don’t have an account yet? No problem, you can subscribe to ONLYOFFICE DocSpace right now – it’s free!
How to add shapes to PDF on Windows
Windows users can rely on Adobe Acrobat, a powerful tool for adding shapes to PDFs. Here’s a step-by-step guide on how to do it:
- Launch Adobe Acrobat and open your PDF document. Click on File and select Open to browse and open the PDF file you want to edit.
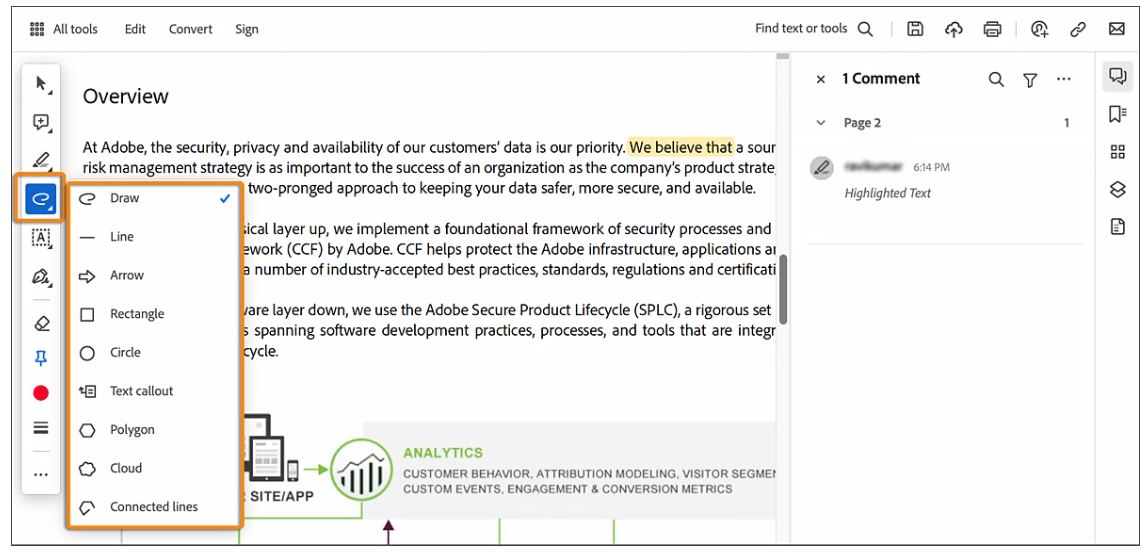
- In the right-hand pane, select the Comment tool. This will open the commenting toolbar, which includes various drawing tools such as the rectangle, oval, line, and arrow.
- Select the desired shape tool from the commenting toolbar, then click and drag on the PDF to add the shape. You can move and resize the shape as needed.
- Right-click on the shape to customize its appearance like color, border thickness, and opacity.
- Once you’ve added and customized your shapes, save your document by clicking File and selecting Save.

How to add shapes to PDF on Mac
Mac users can easily add shapes to PDFs using the built-in Preview app. Here’s how to do it:
- Find the PDF file you want to edit, right-click on it, and select Open With -> Preview.
- In Preview, click on the View menu and select Show Markup Toolbar. This toolbar includes various annotation tools, including shapes.
- Click on the shape icon in the markup toolbar and choose the shape you want to add (e.g., rectangle, oval, line). Click and drag on the PDF to place the shape.
- Use the options in the markup toolbar to adjust the shape’s color, border, and size.
- After adding and customizing the shapes, save your edited PDF by clicking File and selecting Save.
Get ONLYOFFICE Desktop Editors v8.1
In addition to the online version, the ONLYOFFICE suite is available in a desktop version for Windows, macOS and Linux. Get the updated version now:
Create your free ONLYOFFICE account
View, edit and collaborate on docs, sheets, slides, forms, and PDF files online.


