Come incorporare i moduli compilabili ONLYOFFICE in una pagina web
Puoi facilmente aggiungere un modulo online al tuo sito web, rendendolo disponibile per la compilazione e il download in PDF. Continua a leggere questo post e scopri come farlo.

Una breve introduzione
Supponiamo che tu abbia già familiarità con i nostri nuovissimi moduli. In caso contrario, ecco un rapido promemoria. A partire dalla versione 7.0 di ONLYOFFICE Docs, puoi creare, modificare e collaborare sui moduli online, farli compilare da altri utenti e salvarli come PDF.
Nei moduli ONLYOFFICE lavori con due formati principali. DOCXF è destinato alla creazione di modelli di modulo da un file DOCX vuoto o esistente. Il formato OFORM viene utilizzato per compilare i moduli pronti.
Come aprire DOCXF per modificarlo dal sito web
Trova e apri il file index.html del tuo Server di documenti ONLYOFFICE. Quindi, collegalo all’API Document Server. È necessario specificare i parametri di configurazione per l’apertura di un modello di modulo.
<script type="text/javascript"
        src="http://0.0.0.0:8080/web-apps/apps/api/documents/api.js"></script>
   // Specify the path to the API JavaScript file.
<button onclick="open_form_template()">Open Form Template</button>
   // Add a button to open the form.
<div id="placeholder"></div>
   // Add the element where the editor will be opened.
<script>
function open_form_template() {
    // Close the editor in case it is open.
    if (this.docEditor) {
        this.docEditor.destroyEditor()
    }
    // Create the full URL address to the form template you need to open.
    const url = window.location.protocol + "//" +
    window.location.hostname + “:” + window.location.port + ”/” + filename + ”.docxf”;
    // Add the key to identify the file for co-editing.
    const key = filename + ”.docxf”;
    // Create DocsAPI object with the document config and open the editor in the placeholder element.
    this.docEditor = new DocsAPI.DocEditor("placeholder",
    {
        “document”: {
            “fileType”: “docxf”,
            “key”: key,
            “title”: “Form Template”,
            “url”: url
        },
        “documentType”: “word”
    });
}
</script>
Una volta fatto, è possibile aprire un modello di modulo per le modifiche. Dopo aver modificato questo file, puoi ottenere il modulo stesso. Per farlo, fai clic sul pulsante “Salva come oform”.
Come aprire OFORM per la compilazione dal sito web
È necessario aggiungere un pulsante che apra il modulo per la compilazione. Quindi, aggiungi la funzione open_form_template() .
<script type="text/javascript"
        src="http://0.0.0.0:8080/web-apps/apps/api/documents/api.js"></script>
   // Specify the path to the API JavaScript file.
<button onclick="open_form()">Open Form</button>
   // Add a button to open the form.
<div id="placeholder"></div>
   // Add the element where the editor will be opened.
<script>
function open_form_template() {
    // Close the editor in case it is open.
    if (this.docEditor) {
        this.docEditor.destroyEditor()
    }
   // Create the full URL address to the form you need to open.
    const url = window.location.protocol + "//" +
    window.location.hostname + ”:” + window.location.port + ”/” + filename + ”.oform”;
    const key = filename + ”.oform”;
    // Create DocsAPI object with the document config and open the editor in the placeholder element.
    this.docEditor = new DocsAPI.DocEditor("placeholder",
    {
        “document”: {
            “fileType”: “oform”,
            “title”: “Form”,
            “url”: url
        },
        “documentType”: “word”
    });
}
</script>
Tieni in considerazione che il campokey non viene trasmesso alla configurazione degli editor. Questo campo verrà generato automaticamente come numero casuale. Ciò consente di rendere indipendenti tutte le sessioni di apertura del modulo. Quindi, la collaborazione sul file OFORM è disabilitata. Ecco perché chiunque può aprire il modulo e compilarlo senza disturbare gli altri.
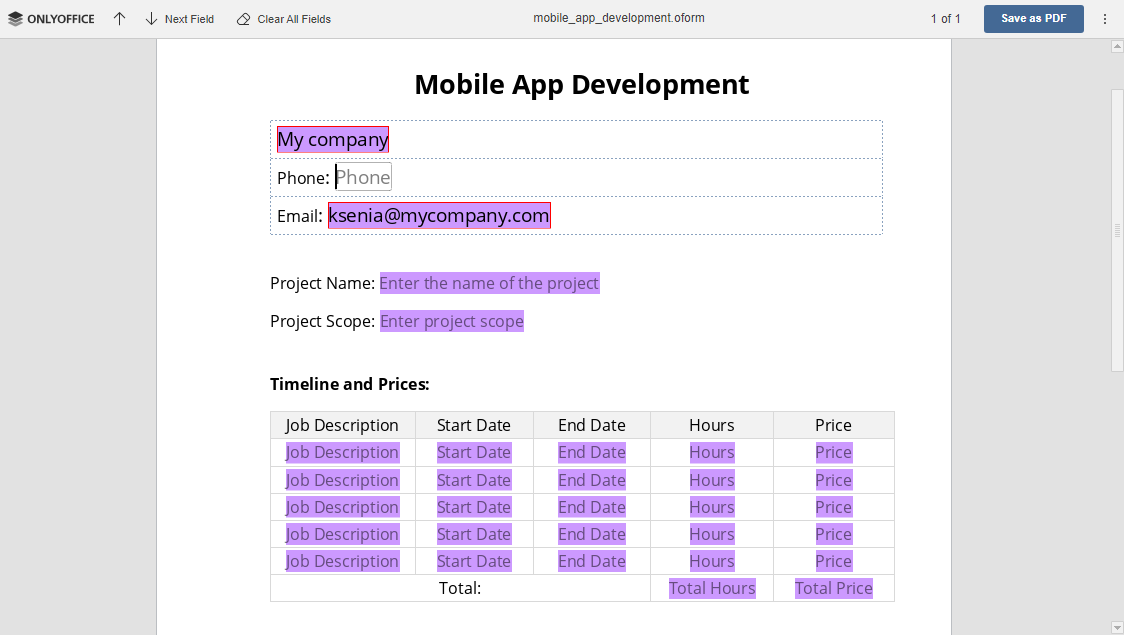
Una volta fatto, è possibile aprire un modulo per la compilazione. Dopo aver compilato i campi (quelli obbligatori sono evidenziati con il bordo rosso), è possibile ottenere un file PDF. Per farlo, clicca pulsante “Salvare come PDF”.

Crea il tuo account ONLYOFFICE gratuito
Visualizza, modifica e collabora su documenti, fogli, diapositive, moduli e file PDF online.


