How to add custom features to the ONLYOFFICE AI plugin
The ONLYOFFICE AI plugin has introduced a new, developer-friendly architecture. If you want to extend the plugin capabilities, for example, to add a specific AI function, you no longer need to edit a massive, monolithic file.
Instead, the plugin now features a dedicated workspace located in the .dev folder. This guide will show you exactly how to use this workspace to add a new custom function.
We will build the Describe image feature for the Document Editor as our example.

The development workflow
The core concept is simple: You work in .dev, and a script builds the production code.
- .dev/helpers/: This is your sandbox. This is where you create new files.
- helpers.js: This is the production file the plugin actually reads. Do not edit this directly. It is auto-generated.
Step 1: Choose your editor scope
Inside .dev/helpers/, you will find three folders corresponding to the ONLYOFFICE editors:
- word/ (Document Editor)
- cell/ (Spreadsheet Editor)
- slide/ (Presentation Editor)
Since our describe image function is for text documents, we will work in .dev/helpers/word/.
Step 2: Create your own function
Create a new file named describe-image.js inside .dev/helpers/word/.
The plugin uses a specific class called RegisteredFunction to define capabilities. This structure tells the AI what the function does and how to call it.
Tip: Ensure your syntax is clean (watch for missing closing brackets).
The code:
(function () {
  let func = new RegisteredFunction({
    name: "describeImage",
    description:
      "Allows users to select an image and generate a meaningful title, description, caption, or alt text for it using AI.",
    // Define parameters so the AI knows what to ask for
    parameters: {
      type: "object",
      properties: {
        prompt: {
          type: "string",
          description:
            "instruction for the AI (e.g., 'Add a short title for this chart.')",
        },
      },
      required: ["prompt"],
    },
    // Provide examples to train the AI on usage
    examples: [
      {
        prompt: "Add a short title for this chart.",
        arguments: { prompt: "Add a short title for this chart." },
      },
      {
        prompt: "Write me a 1–2 sentence description of this photo.",
        arguments: {
          prompt: "Write me a 1–2 sentence description of this photo.",
        },
      },
      {
        prompt: "Generate a descriptive caption for this organizational chart.",
        arguments: {
          prompt:
            "Generate a descriptive caption for this organizational chart.",
        },
      },
      {
        prompt: "Provide accessibility-friendly alt text for this infographic.",
        arguments: {
          prompt:
            "Provide accessibility-friendly alt text for this infographic.",
        },
      },
    ],
  });

   // The actual logic executed inside the editor
  func.call = async function (params) {
    let prompt = params.prompt;

    async function insertMessage(message) {
      Asc.scope._message = String(message || "");
      // 3. Insert the result into the document
      await Asc.Editor.callCommand(function () {
        const msg = Asc.scope._message || "";
        const doc = Api.GetDocument();
        const selected =
          (doc.GetSelectedDrawings && doc.GetSelectedDrawings()) || [];
        if (selected.length > 0) {
          for (let i = 0; i < selected.length; i++) {
            const drawing = selected[i];
            const para = Api.CreateParagraph();
            para.AddText(msg);
            drawing.InsertParagraph(para, "after", true);
          }
        } else {
          const para = Api.CreateParagraph();
          para.AddText(msg);
          let range = doc.GetCurrentParagraph();
          range.InsertParagraph(para, "after", true);
        }
        Asc.scope._message = "";
      }, true);
    }

    try {
    // 1. Get the selected image
      let imageData = await new Promise((resolve) => {
        window.Asc.plugin.executeMethod(
          "GetImageDataFromSelection",
          [],
          function (result) {
            resolve(result);
          }
        );
      });

      if (!imageData || !imageData.src) {
        await insertMessage("Please select a valid image first.");
        return;
      }

      const whiteRectangleBase64 =
        "data:image/png;base64,iVBORw0KGgoAAAANSUhEUgAAAAEAAAABCAYAAAAfFcSJAAAADUlEQVR42mP8/5+hHgAHggJ/PchI7wAAAABJRU5ErkJggg==";
      if (imageData.src === whiteRectangleBase64) {
        await insertMessage("Please select a valid image first.");
        return;
      }

      let argPrompt = prompt + " (for the selected image)";
      // 2. Send image + prompt to the AI engine
      let requestEngine = AI.Request.create(AI.ActionType.Chat);
      if (!requestEngine) {
        await insertMessage("AI request engine not available.");
        return;
      }

      const allowVision = /(vision|gemini|gpt-4o|gpt-4v|gpt-4-vision)/i;
      if (!allowVision.test(requestEngine.modelUI.name)) {
        await insertMessage(
          "⚠ This model may not support images. Please choose a vision-capable model (e.g. GPT-4V, Gemini, etc.)."
        );
        return;
      }

      await Asc.Editor.callMethod("StartAction", [
        "Block",
        "AI (" + requestEngine.modelUI.name + ")",
      ]);
      await Asc.Editor.callMethod("StartAction", ["GroupActions"]);

      let messages = [
        {
          role: "user",
          content: [
            { type: "text", text: argPrompt },
            {
              type: "image_url",
              image_url: { url: imageData.src, detail: "high" },
            },
          ],
        },
      ];

      let resultText = "";
      await requestEngine.chatRequest(messages, false, async function (data) {
        if (data) {
          resultText += data;
        }
      });

      await Asc.Editor.callMethod("EndAction", ["GroupActions"]);
      await Asc.Editor.callMethod("EndAction", [
        "Block",
        "AI (" + requestEngine.modelUI.name + ")",
      ]);

      Asc.scope.text = resultText || "";

      if (!Asc.scope.text.trim()) {
        await insertMessage(
          "⚠ AI request failed (maybe the model cannot handle images)."
        );
        return;
      }
      await insertMessage(Asc.scope.text);
    } catch (e) {
      try {
        await Asc.Editor.callMethod("EndAction", ["GroupActions"]);
        await Asc.Editor.callMethod("EndAction", [
          "Block",
          "AI (describeImage)",
        ]);
      } catch (ee) {
        /* ignore */
      }
      console.error("describeImage error:", e);
      await insertMessage(
        "An unexpected error occurred while describing the image."
      );
    }
  };

  return func;
})();
Step 3: Upgrade the plugin version
Before compiling and testing your changes, it’s a good practice to bump the plugin version. This ensures ONLYOFFICE treats your build as a new plugin, avoids caching issues, and helps track changes over time.
Open config.json in your plugin folder.
Increase the version by one patch level, for example:
"version": "3.0.0" to "3.1.0"
This is recommended for both desktop and web editors:
Desktop: Ensures the app reloads the updated plugin.
Web (including custom store links): Prevents caching from ignoring your changes in helpers.js.
Step 4: Compile your changes
This is the most important step in the new workflow. The plugin cannot read your new file directly yet. You must run the helper script to merge your new file into the main plugin logic.
- Open your terminal.
- Navigate to the helpers directory:
cd .dev/helpers - Run the Python build script:
python3 helpers.py
The helpers.py script will scan the word/, cell/, and slide/ folders, find your new describe-image.js, and merged it into the main helpers.js file.
Step 5: Creating the .plugin file
- Select all plugin contents.
- Zip them.
- Rename the archive from .zip to .plugin.
- Place it in a folder named deploy inside your plugin.
Step 6: Replace the plugin in ONLYOFFICE
Desktop Editor
In recent versions of ONLYOFFICE Desktop Editors, the AI plugin is included by default. If you’re using an older release where the plugin wasn’t bundled yet, the installation process depends on your situation and follows two possible paths:
A) Installing the AI plugin for the first time
If the AI plugin is missing from your local plugin directory:
- Open ONLYOFFICE Desktop Editors.
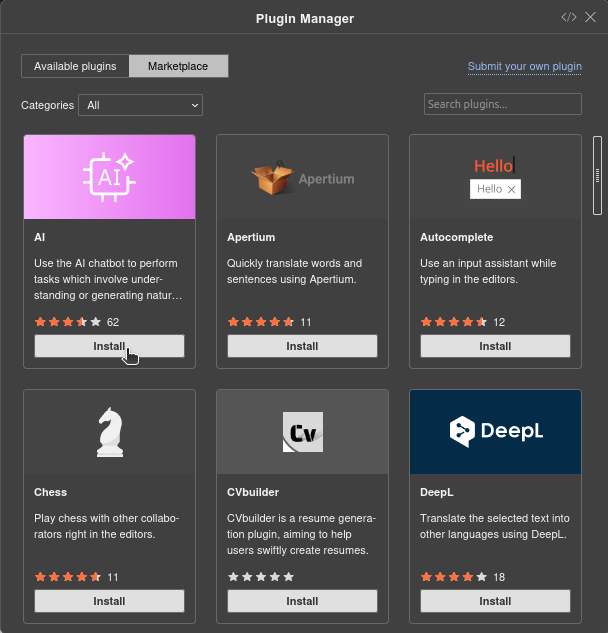
- Go to Plugins → Plugin Manager → Available Plugins → Install plugin manually.
- When asked to select a file, choose your compiled .plugin file.
B) Updating an existing local copy of the AI plugin
If the plugin is already present on your system:
- Go to ~/.local/share/onlyoffice/desktopeditors/sdkjs-plugins
- Find the folder whose name matches the plugin GUID from config.json – {9DC93CDB-B576-4F0C-B55E-FCC9C48DD007}
- Replace the folder with your newly built plugin.
- Restart the desktop app.
Web Editor (via Custom store link)
Custom store link
Enable GitHub Pages for your fork.
Make sure you increment the version in config.json to avoid caching issues.
- Fork the ONLYOFFICE Plugin Marketplace repository. You will get a copy at:
https://github.com/YOUR-USERNAME/ONLYOFFICE/onlyoffice.github.io - Ensure your plugin folder includes a deploy folder containing the .plugin file.
- Add your plugin folder to:
onlyoffice.github.io/sdkjs-plugins/content/ai/ - Build your GitHub Pages site from this repository (see GitHub Pages documentation
- Prepare a link to your custom store by appending /store/index.html to your GitHub Pages URL:
https://YOUR-USERNAME.github.io/onlyoffice.github.io/store/index.html - Increment the plugin version in config.json (as described in Step 3) to bypass caching.
Update plugin
Before updating it with your custom version, you may need to remove the preinstalled one, depending on your setup.
- Check whether the AI plugin is already installed
Open the Web Editor and go to Plugins → Plugin Manager.
If the AI plugin is installed, remove it:

If it’s not installed, continue to the next step.
This ensures the custom version can be installed or updated without conflicts.
- Add your custom store
Click the store icon in the top-right corner of the Plugin Manager:
![]()
Enter your custom store URL:
https://YOUR-USERNAME.github.io/onlyoffice.github.io/store/index.html

Your custom store will now appear in the Plugin Manager.
- Install the AI plugin
Once your custom store loads, find AI Assistant in the list and click Install.
Step 7: Test your feature
- Reload the plugin in ONLYOFFICE.
- Select an image in your document.
- Ask the AI: “Describe this image” or “Write a caption for this.”
The AI will now recognize your new custom function and execute the logic you just wrote.
Create your free ONLYOFFICE account
View, edit and collaborate on docs, sheets, slides, forms, and PDF files online.